lunes, 25 de julio de 2011

Codornices en salsa


Hace unos días ví una deliciosa película: "El festín de Babette", en ella la protagonista prepara una suculenta cena en agradecimiento a los vecinos que tan bien la han acogido durante años. El plato estrella de este festín eran "perdices en sarcófago", un plato de alta cocina francesa. Nunca he comido perdices y me entraron ganas de intentar hacer algo parecido. En el mercado no las encontré, pero sí que habían codornices, que tampoco había probado nunca. Mis habilidades culinarias todavía no me permiten copiar la receta de la película, pero encontré una receta sencilla que sí me he atrevido a hacer. Os la cuento...
Ingredientes:
* 4 codornices
* 1 cebolla
* 2 zanahorias
* 1 pimiento verde
* 1 puerro
* 2 ajos
* Harina
* 50 ml de vinagre
* 200ml de vino tinto
* 2 clavos de olor
* 1 Patata
* Aceite
* Pimienta
* Sal
Preparación:
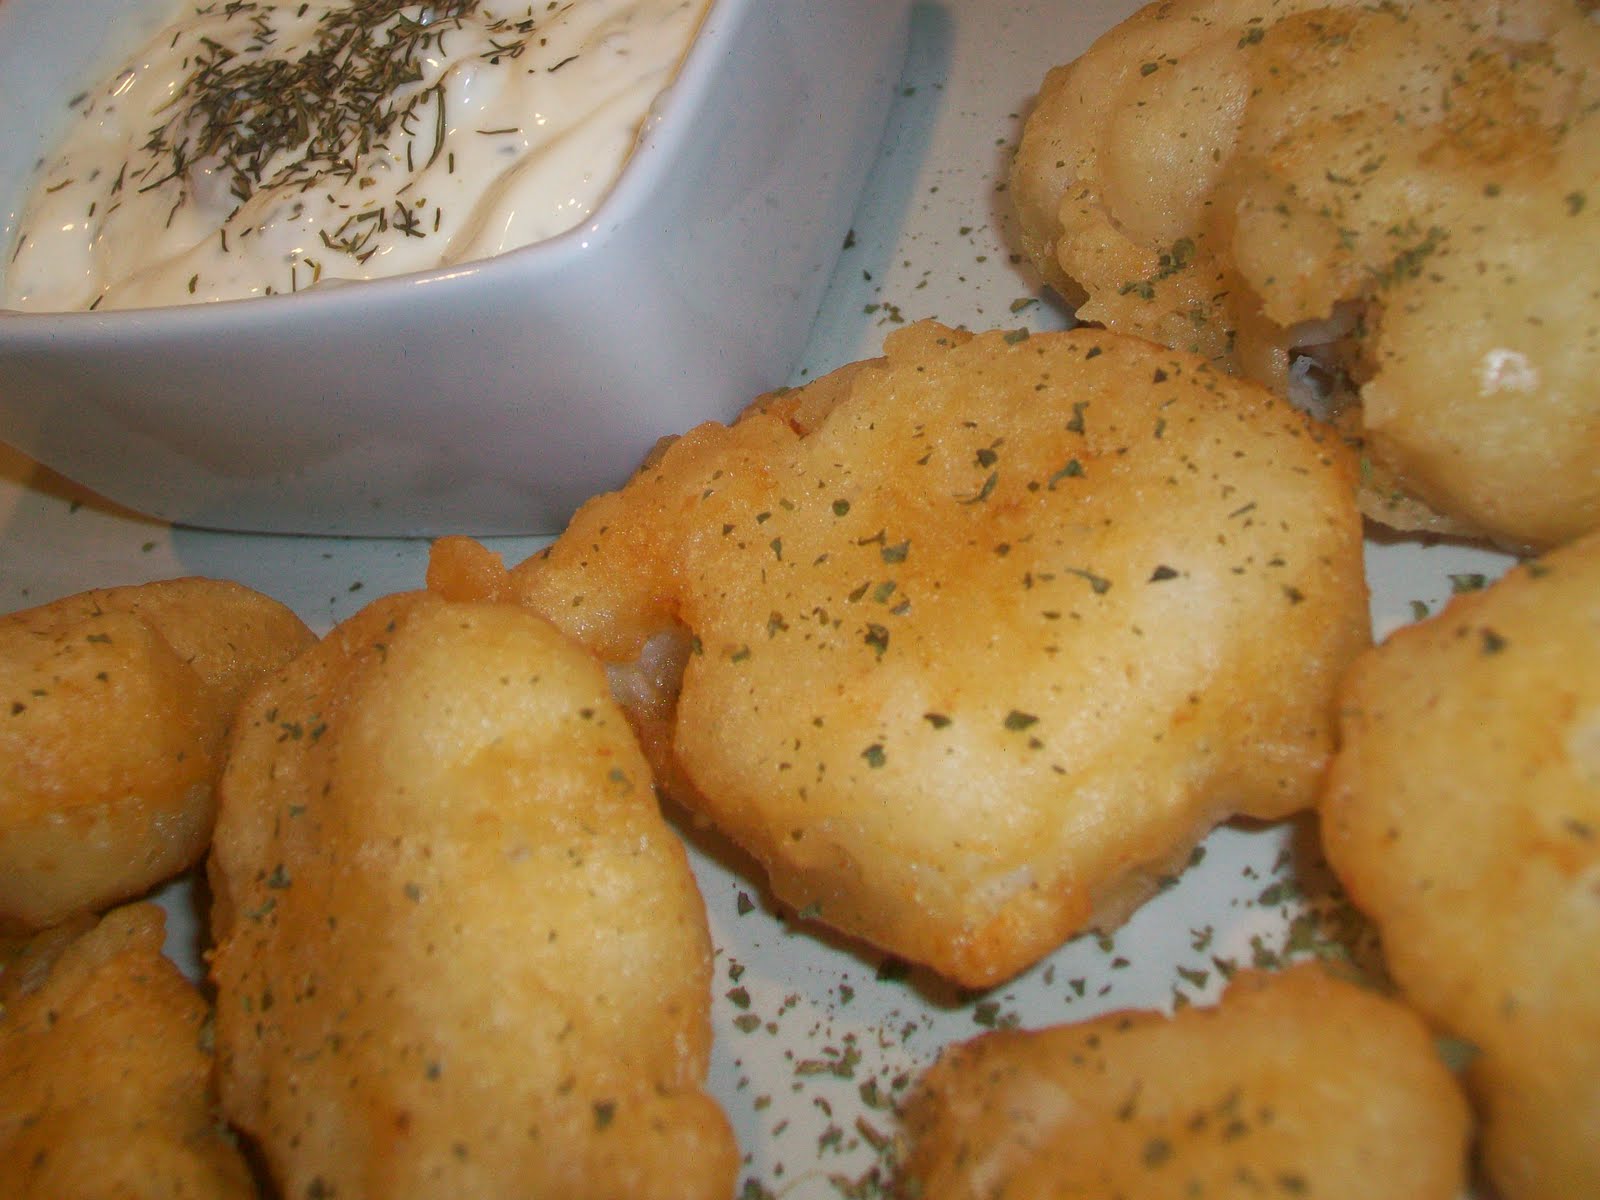
- Lavamos bien las codornices (las compré vacías y limpias), las salpimentamos y las enharinamos un poco. Ponemos aceite en una olla y las freímos hasta que se doren. Reservar.
- Troceamos la cebolla, las zanahorias, el pimiento verde, el puerro y los ajos y los ponemos a pochar en el mismo aceite donde hemos frito las codornices. Añadimos los clavos de olor, pimienta y sal.
- Cuando las verduras estén pochadas, incorporamos las codornices, las rociamos con el vinagre y las cubrimos con el vino tinto. Dejamos cocer una hora y media, si vemos que se reduce demasiado el caldo, podemos ir añadiendo agua.
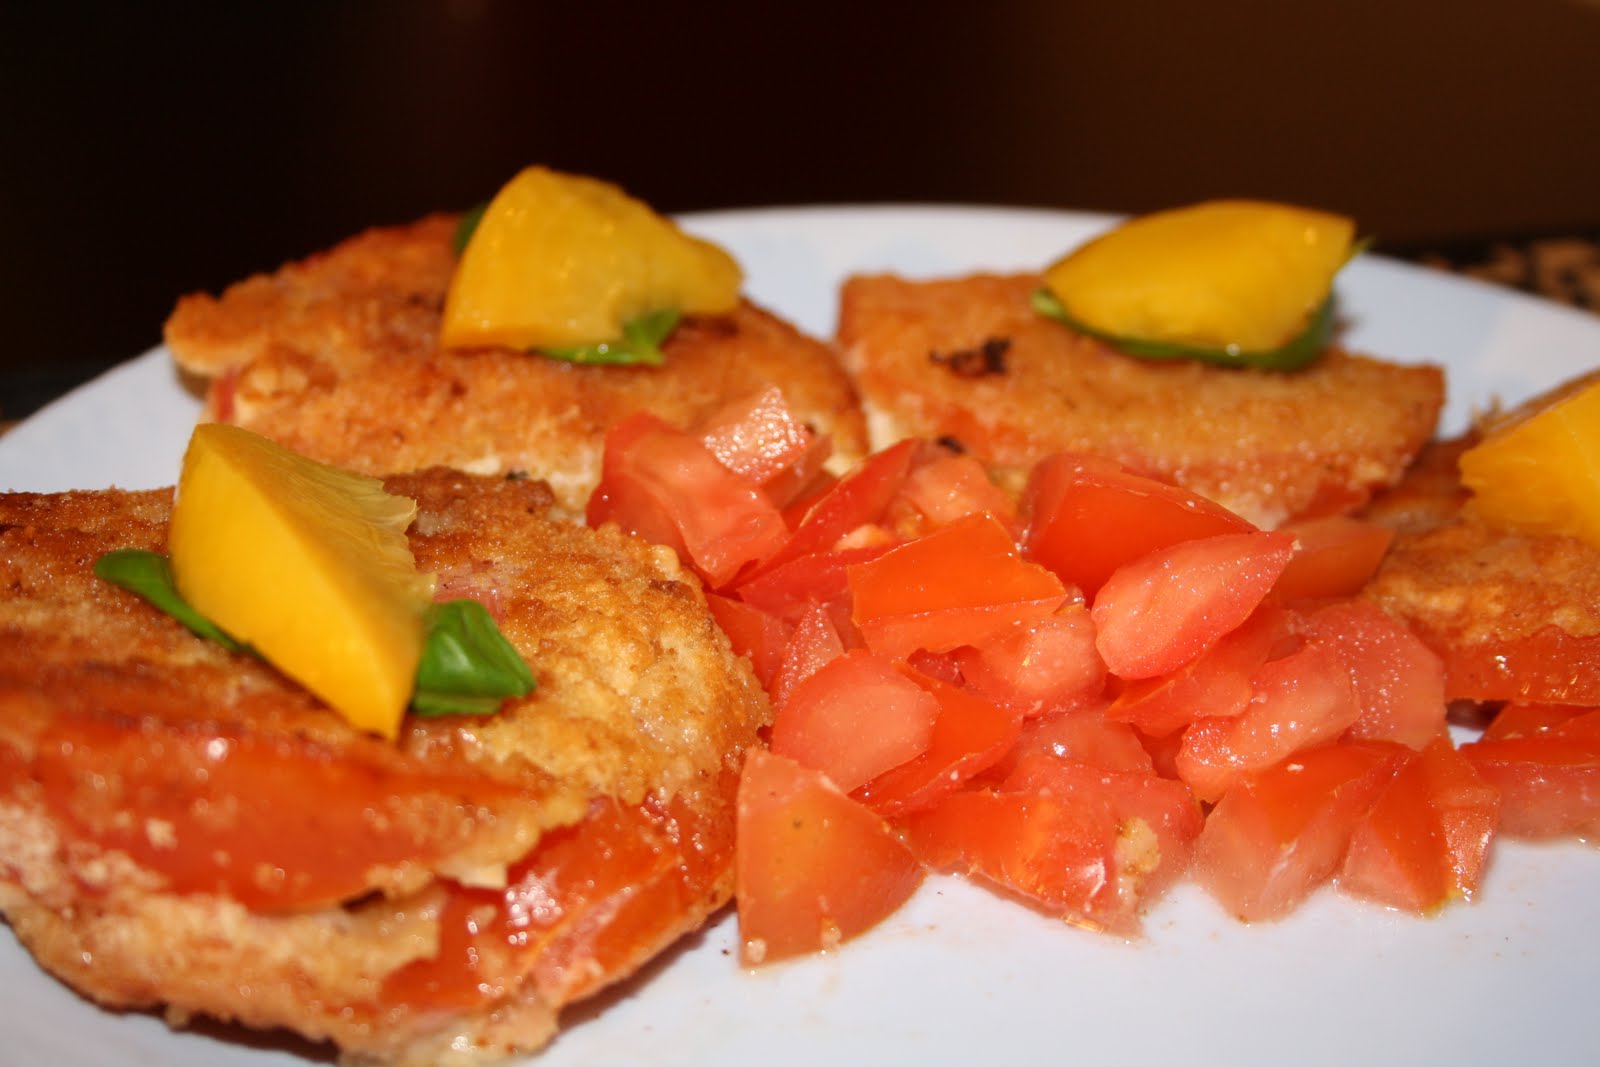
- Cuando esté listo, partimos las codornices por la mitad. Pasamos la salsa por el chino o la trituramos un poco y cubrimos las codornices con la salsa.
- Como guarnición, he rallado una patata y la he frito como si fuera una torta finita, así queda más crujiente.
  
Mi primera experiencia con estas aves no podía haber salido mejor, quedan buenísimas. Son parecidas al pollo, pero más gustosas. Ya me han soplado por ahí que en escabeche también son estupendas, habrá que seguir experimentando....Por cierto, a raíz de la película, mi hermana y yo ya estamos maquinando la idea de hacer una sección de recetas de película, estad atent@s al blog...


 Quails in sauce

A few days ago I saw a film “ Babette’s Feast”. In it, the protagonist prepared a delicious meal in order to thank the neighbors for being friendly with her all those years. The main course was “partridge in a sarcophagus” a dish from the fine cuisine of France. I’ve never eaten partridge and I wanted to try something similar. As I didn’t find them in the market, I bought quails because I’ve never eaten either.
My skills in the kitchen don’t allow me to prepare the meal like in the film is...but I found this easy recipe:

Ingredients:

* 4 Quails
* 1 onion
* 2 carrots
* 1 green pepper
* 1 leek
* 2 garlic cloves
* Flour
* 50 ml vinegar
* 200ml red wine
* 2 cloves
* 1 Potato
* Oil
* Pepper
* Salt

Preparation:

-Wash the quails (I bought them empty), sprinkle salt and pepper over them and coat in flour. Put oil in a pan and fry them until golden. Reserve it for later.
-Chop the onions, carrots, green pepper, leek and garlic and put them to soften in the same oil as the quails. Add the cloves, pepper and salt.
-When the vegetables are poached, place the quails, sprinkle with vinegar and cover them with red wine. Let it cook for an hour and a half if you see that the broth is too much reduced, you can add water.
-Once ready, cut the quails in halves. Grind a bit the sauce and cover the quails with it.
-As a side dish, I made a small omelet with grated potatoes, it is crusty.

My first experience with these birds could not have been better, they are delicious. They are similar to chicken, but tastier...By the way, as a result of the film, my sister and I are already cooking up the idea of a section films and their recipes...pay @ttention to the blog!


Pinchitos de tomate y jamón


Un aperitivo fresco, que se prepara en menos de 5 minutos, queda vistoso y está rico...¿se puede pedir más?
Ingredientes:
* Tomates cherry
* Jamón ibérico
* Nueces
* Aceite de oliva virgen extra
* Vinagre balsámico
* Sal
* Orégano
Preparación:
- Lavamos los tomates cherry y los partimos por la mitad.
- Ponemos un trocito de jamón encima de los tomatitos y los sujetamos con unos palillos.
- Hacemos una vinagreta con el aceite, el vinagre, una pizca de sal y de orégano. Añadimos las nueces picadas en trocitos pequeños y removemos. Regamos los tomatitos con la vinagreta.
Estas mini brochetas quedan muy bien y se pueden hacer con múltiples combinaciones (queso fresco, fruta...), nos pueden sacar de un apuro en caso de tener invitados por sorpresa o para montarnos un buen aperitivo en tiempo récord!

Skewers of tomato and ham


A fresh snack, prepared in less than 5 minutes, it is colorful and rich…what else can you ask for?

Ingredients:

* Cherry tomatoes
* Cured Iberian ham
* Nuts
* Extra virgin olive oil
* Balsamic vinegar
* Salt
* Oregano

Preparation:

-Wash the cherry tomatoes and cut them in halves.
-Put a slice of ham on the top of the tomatoes and hold them with toothpicks.
-Make vinaigrette with olive oil, vinegar, a bit of salt and oregano. Add the finely cut nuts and stir. Sprinkle the tomatoes with the vinaigrette.

These mini skewers can be done with multiple combinations: fresh cheese, fruit, etc…And they can save you if you suddenly have unexpected guests to prepare something in a record time!

Pescado blanco con chorizo


Como ya véis en el título, esta receta admite cualquier tipo de pescado blanco. Yo la hice con el famoso "haddock", ya que por aquí no se encuentra demasiada variedad. Así que eché mano de la "BBC recipe’s book" y me puse manos a la obra.
    
Ingredientes:

* Lomos de pescado blanco (lenguado, merluza, etc.)
* Chorizo
* Patatas
* 1 diente de ajo
* Tomates cherry
* Pimienta
* Sal
* Orégano

Preparación:

- En una bandeja para horno, ponemos el pescado, lo rociamos con aceite de oliva, pimienta y orégano. Dejamos cocinar unos 20 minutos o hasta que esté tierno.
- En una sartén, freiremos patatas cortadas previamente en rodajas finas. Cuando estén listas, las reservamos para más tarde.
- En el mismo aceite pondremos el ajo bien picado, añadiremos unas rodajas de chorizo (al gusto), cuando el chorizo libere su grasilla, pondremos los tomates cherry cortados por la mitad y dejaremos que se doren vuelta y vuelta.
- Sobre la capa de patatas, pondremos las rodajas de chorizo, encima el pescado y decoraremos con los tomates cherry. Con una cuchara tirar por encima del conjunto un chorrito del jugo de la sartén.

Esta receta me llamó la atención por la combinación de pescado y chorizo, que nunca antes había probado y he de decir que fue una muy grata sorpresa. Buen provecho!


This is a recipe that I found on the Internet but I changed it a little bit.

Ingredients (two people):

* 4-6 Loins of haddock (depends on its size)
* Chorizo
* Potatoes
* 1 clove garlic
* Cherry tomatoes
* Pepper
* Sal
* Oregano

Preparation:

-In a tray up for the oven, place the loins of the fish with a little bit of olive oil and sprinkle over them pepper and oregano. Let it cook for 20 minutes or until is tender.
-In a pan, put to fry the potatoes previously cut into slices. Reserve them for later.
-With the same oil, fry the chopped garlic, add the slices of chorizo (as many as you want), when the chorizo releases its fat add the halves of cherry tomatoes and let them brown for a few minutes.
-Put some potatoes in a plate, add some slices of chorizo, add the fish and put the cherry tomatoes on the top. With a spoon, throw a splash of juice from the pan over them.

This recipe caught my attention because I've never eaten before this combination of fish and chorizo...and I have to say that it really was a pleasant surprise. Enjoy the meal!

Haddock with chorizo

Bizcocho de leche condensada


Este bizcocho lo había visto ya en varios sitios, todos coincidían en que quedaba muy esponjoso y con un sabor muy rico. Así que tenía que probarlo. La verdad es que tenían razón y además es muy fácil de hacer.
Ingredientes:
* 1 bote pequeño de leche condensada
* 4 huevos
* 50 gr de mantequilla
* 150gr de harina
Preparación:
- Derretir la mantequilla en el microondas.
- En un bol, ponemos la leche condensada, añadimos los huevos, uno a uno, y vamos removiendo bien. Añadimos la mantequilla derretida y la harina también poco a poco. Mezclamos bien.
- Lo vertemos en un molde y lo ponemos en horno precalentado a 180º, unos 30 minutos, hasta que esté cocido.
Nos ha gustado mucho la textura y el sabor, me recuerda al sabor de las magdalenas de cuando era pequeña. Ya estoy planeando hacer unas magdalenas con leche condensada, a ver cómo quedan. Espero que os guste!

Condensed milk cake


I had already seen this cake in many places and all were agreed that was very soft and it had a tasty flavor. So I decided to prepare it and I discovered that they were right and it’s very easy to make.

Ingredients:

* 1 small can of condensed milk
* 4 eggs
* 50 g butter
* 150g flour

Preparation:

-Melt the butter in the microwave.
-In a bowl, put the condensed milk, add eggs, one by one, and stir it well. Add the melted butter slowly and the flour. Mix well.
-Pour the dough in a cake tin. Preheat the oven at 180ºC and cook it for 30 minutes.

I liked very much the texture and the flavor reminded me one of those cupcakes that I used to eat when I was child. Now I’m thinking about prepare condensed milk cupcakes to know how they look. I hope you like it!

Pescado rebozado con masa de cerveza


En casa somos futboleras y anoche comenzaba la temporada nuestro equipo. Esta receta resulta ideal para una cena informal de noche de fútbol. Ya os comenté mi pasión por el bacalao, así que ahí va otra receta para la colección!
Ingredientes:
* 4 lomos de bacalao
* 200gr de harina
* Zumo de limón
* 160ml de cerveza
* Aceite de oliva
* 2 cucharaditas de levadura en polvo
* 2 cucharaditas de bicarbonato
* Mayonesa
* Alcaparras
* 1 cebolleta
* Eneldo
* Perejil
* Pimienta molida
* Sal
Preparación:
- Primero hemos de preparar la harina, para ello cogemos la harina y la mezclamos con la levadura, el bicarbonato y una cucharadita de sal.
- Cogemos unos 75gr de esta harina preparada y empanamos el pescado.
- Mezclamos la harina restante con zumo de limón, cerveza y un chorrito de aceite, hasta que quede una masa homogénea.
- Pasamos los lomos de bacalao por esta mezcla y los freímos hasta que estén dorados. Los retiramos sobre papel de cocina para que absorba el exceso de aceite.
 Para acompañar, yo he preparado una versión libre de salsa tártara de la siguiente manera:
- Mezclamos la mayonesa con un poco de zumo de limón, las alcaparras, la cebolleta picada muy fina, eneldo y pimienta.
 -Espolvoreamos el pescado con perejil y lo servimos acompañado de la salsa tártara.
Se puede hacer con cualquier tipo de pescado blanco (merluza, etc..), el rebozado queda muy crujiente y ligero . Con una cervecita fresquita, resulta ideal. Buen provecho!

Beer-battered fish


At home we are football followers and yesterday night started the season of our team. This recipe is ideal for a casual dinner in a football match night. I told once about my passion for codfish, so here’s another recipe for the collection!

Ingredients:

* 4 Cod loins
* 200g flour
* lemon juice
* 160 Ml of beer
* Olive-Oil
* 2 Teaspoons yeast
* 2 tablespoons of baking soda
* Mayonnaise
* capers
* 1 onion
* dill
* parsley
* pepper
* Salt

Preparation:

- Firstly, we have to prepare the flour: mix with the yeast, baking soda and a little bit of salt.
- Take 75gr out of this flour and coat the fish.
-Mix the remaining flour with lemon juice, beer and a little bit of oil, stir until get a homogeneous mixture.
-Dip the cod loins in the mixture and fry them until golden. Remove and dry them with kitchen paper.

It can be served with this kind of free version of tartar sauce that I prepared on my own.

-Mix the mayonnaise, with a little bit of lemon juice, capers, finely chopped spring onions, dill and pepper.
-Sprinkle parsley over the fish and serve with the sauce.

You can cook this recipe with any type of white fish; the result is a very crisp and lighter fish and accompanied by a cold beer, is ideal. Bon appetite!

jueves, 21 de julio de 2011

Aperitivos de capricho


Se pueden comer como aperitivo, como entrante o como cena ligera...pero los comas como los comas son de auténtico capricho.

Ingredientes (para 2 personas):

* 4 tomates grandes de ensalada
* Mozzarella
* Albahaca
* Melocotón en almíbar
* 2 Huevos
* Pan rallado
* 2 cucharas de harina
* Aceite
* Sal

 Preparación:

- Cortar los tomates y la mozzarella en rodajas.
- Poner la mozzarella entre dos rodajas de tomate con una hoja de albahaca.
- Batir los huevos y añadir las cucharadas de harina. Pasar los montaditos por el huevo y seguidamente por el pan rallado.
- En una sartén con un chorrito de aceite, dejamos freír un poquito por ambos lados.
- Servir con un poco de melocotón encima para decorar.
Espectaculares y fáciles de preparar. Podéis incluso aprovechar los culos del tomate para hacer un picadillo.


Little whims


They can be eaten as a snack, as a starter or as a light dinner..but whatever you eat, they are
truly a whim.

Ingredients (for 2 people):

* 4 big salad tomatoes
* Mozzarella
* Basil
* Peach in juice fruit
* 2 eggs
* Grated bread
* 2 tablespoons of flour
* Oil
* Salt

Preparation:

- Cut the tomatoes and the mozzarella into slices.
- Place the mozzarella between two slices of tomato with a basil leaf.
- Whisk the eggs and add the spoons of flour. Dip the sandwiches in the egg and then in the breadcrumbs.
- In a pan with hot oil, fry them a little bit on both sides.
- Serve with peach on the top to decorate.

They are spectacular and easy to prepare. You can take advantage of the bottoms of the tomatoes to make a little salad.


Recetas en inglés/ Recipes in english


Debido al gran éxito internacional que está teniendo nuestro blog, nos vemos en la necesidad de ampliar fronteras...jejejj. Ahora en serio, como el blog lo hacemos desde dos países diferentes, hemos creído oportuno traducir las recetas al inglés para que nuestros seguidores británicos no se pierdan detalle.  Así que a partir de ahora, también podréis encontrar las recetas en "english". Las podréis ver a continuación de cada receta en castellano. Aprovechamos la ocasión para animaros a participar activamente y recordaros que podéis dejar vuestras impresiones, dudas, etc... en el apartado "comentarios" de cada receta. Un saludo!


Because of the international success that is having our blog, we are in the necessity of making broad our frontiers...:D. Now, seriously, because of we are making the blog from two different countries, we've believed correct to translate the recipes into english so as not to allow our followers to miss a thing. So, from now you could find the recipes in english . You could see them after each spanish recipe. We take advantage of this opportunity to cheer up to participate actively and remind you that you can leave your feedback, doubts, etc..in the separated box " comentarios/ comments" of each recipe. Best regards!

lunes, 18 de julio de 2011

Empanadillas de morcilla y pera/ Empanadillas de paté de berenjena y pimiento


Hace bastantes años, en un programa de televisión, ví una receta en la que combinaban morcilla y pera. Lo primero que pensé era cómo podía casar esa extraña unión. Después he visto otras muchas recetas con esta curiosa mezcla, así que al final me he atrevido a hacerla. Aprovechando que quería probar el relleno de berenjena y pimiento para unas empanadillas, pensé que por qué no hacer unas también con la morcilla y la pera y salir de dudas. El resultado....están de vicio!

* Empanadillas de morcilla y pera:

Ingredientes:

* Obleas de empanadillas
* 1 morcilla
* 1 pera
* 1 cebolla
* Azúcar
* Vinagre
* Huevo
* Aceite

Preparación:

- Cortamos la cebolla en juliana y la pochamos con un chorrito de aceite. Cuando esté tierna, añadimos 2 cucharaditas de azúcar y un chorrito de vinagre. Dejamos reducir un poco.
- Pelamos la pera y la cortamos a trocitos, la agregamos a la cebolla y rehogamos.
- Añadimos la morcilla sin piel y cortada a trozos, rehogamos el conjunto hasta que la morcilla está hecha.
- Extendemos las obleas y vamos rellenándolas con la mezcla, las cerramos con ayuda de un tenedor y pintamos con yema de huevo.
- Las ponemos en horno precalentado a 180º unos 15 minutos o hasta que estén doradas.

* Empanadillas de berenjena y pimiento:

Ingredientes:

* Obleas de empanadillas
* 1 berenjena
* 4 pimientos del piquillo
* Aceite
* Sal
* Huevo

Preparación:

- Cortamos la berenjena a lo largo por la mitad, con un cuchillo hacemos unos cortes , sazonamos con sal y un chorrito de aceite. La ponemos al microondas durante unos 7 minutos hasta que esté tierna. Con ayuda de una cuchara vaciamos la pulpa.
- Cortamos los piquillos en tiras y los trituramos junto la berenjena, rectificamos de sal.
- Extendemos las obleas y las rellenamos, las cerramos con ayuda de un tenedor y repetimos el proceso de pintar con huevo y ponerlas al horno.

Las empanadillas las podéis freir si queréis. En casa nos gustan más al horno, quedan más ligeras. Las de berenjena y pimiento ya intuía que podían quedar buenas (y así ha sido), pero ni por asomo podía imaginar que las de morcilla estuviesen tan ricas, casi ni llegan para poder hacer la foto!


Pasties of bloody sausages and pears / Pasties of eggplant cream and peppers


Several years ago, on a TV programme, I saw a recipe that combined bloody sausages with pears. The first thing I thought was how this strange combination could go well. Later, I’ve seen many recipes with this different combination so finally, I decided to prepare it. As I wanted to prove the eggplant cream and the peppers stuffed to make pasties, I also made some with the bloody sausages and pears to find out if they are good..and the result was unbelievable!!

Ingredients:

* Pasties
* 1 bloody sausage
* 1 pear
* 1 onion
* Sugar
* Vinegar
* Egg
* Oil

Preparation:

- Chop the onion and put in a pan with a little bit of oil. When is tender, add 2 teaspoons of sugar and splash of vinegar. Leave it to reduce.
- Peel and cut pears into pieces and add it to the onion.
- Add the sausage, skinless, and cut into pieces. Add it to the pan and cook until the sausage is made.
- Extend the pasties and fill them with the mixture, close them using a fork and paint the cover with egg.
- Preheat the oven at 180ºC and leave to bake for 15 minutes or until browned.

Pasties of eggplant cream and peppers
Ingredients:

* Pasties
* 1 eggplant
* 4 red peppers
* Oil
* Salt
* Egg

Preparation:

-Cut the eggplant in two halves (by the long side). Make some cuts with a knife, add salt and a little bit of oil. Put it into the microwave for 7 minutes or until is tender. Using a spoon in order to empty the pulp.
-Cut the peppers into strips and grind together with the eggplant, add salt.
- Fill the pasties with the mixture, close them using a fork and paint the cover with egg.
-Bake them.

You can fry the pasties as well .At home we preferred to bake them, are lighter. Try to make them, you will be very surprised! They almost run out before taking the picture!

domingo, 17 de julio de 2011

Quiche de manzana


La tarta de manzana es un clásico y en cada casa se prepara de forma distinta. La he probado de hojaldre, de bizcocho, rellena, etc...pero no la había hecho nunca como si fuera una quiche. Así que ahí va el resultado.

Ingredientes:

* 1 lámina de masa quebrada extendida
* 4 manzanas
* 5 huevos
* 150gr. de azúcar
* 200ml de nata para cocinar
* Almendra molida
* Canela
* Mermelada de melocotón

Preparación:

- Extendemos la masa quebrada sobre el molde y la pinchamos con un tenedor. Espolvoreamos sobre la base, almendra molida y canela.
- Pelar las manzanas y cortarlas a trocitos. Ponerlas sobre la masa.
- Batimos los huevos con el azúcar y la nata y añadimos la mezcla sobre las manzanas.
- Lo ponemos en el horno precalentado (con calor arriba y abajo) a 200ºC durante unos 30 minutos, después lo dejamos sólo con calor abajo y bajamos la temperatura a 175ºC durante 20 minutos.
- Dejamos que se temple y pintamos con la mermelada para darle brillo.

Un postre que siempre gusta y que resulta bastante ligero. A disfrutar!


Apple quiche


The Apple pie is a classic dessert and in every house is prepared in different ways. But I’ve never done like a quiche before. So here is the result.

Ingredients:

* 1 sheet of pastry
* 4 apples
* 5 eggs
* 150gr. sugar
* 200ml cooking cream
* Ground almonds
* Cinnamon
* Peach Jam

Preparation:

- Place the sheet of pastry in a cake tin and make some little holes in it with a fork. Sprinkle the ground almonds and the cinnamon.
- Peel apples and cut them into pieces. Put them on the pastry.
- Whisk the eggs with sugar and cream and add the mixture over the apples.
- Preheat the oven up to 200ºC for 30 minutes, and then lower the temperature at 175ºC for 20 minutes.
- Leave to warm and paint on the top with the jam.

A dessert that everyone likes!

Solomillo a la mexicana


De entrada quiero aclarar que no es el auténtico solomillo a la mexicana, sinó una variante más "edulcorada". En cualquier caso, está riquísimo, la salsa muy buena y el contraste con las frutas genial.

Ingredientes:

* Solomillo de cerdo
* Piña al natural
* Melocotón en almíbar
* 1 nuez de mantequilla
* Concentrado de carne
* 1 copita de Pedro Ximenez
* Salsa perrins
* Tabasco
* Sal
* Pimienta
* Aceite

Preparación:

- Cortamos el solomillo de cerdo en medallones y los salpimentamos. Los ponemos en una sartén con una nuez de mantequilla y una gota de aceite para que esta no se nos queme. Los doramos al punto que más nos guste. Añadimos la copita de Pedro Ximénez y flambeamos. Quitamos los medallones de la sartén y reservamos.
- En la misma sartén, ponemos las rodajas de piña y los melocotones, le damos unas vueltas y añadimos: una cucharada de concentrado de carne disuelta en un vaso de agua, un poco del jugo del melocotón o la piña, salsa perrins y tabasco al gusto. Dejamos reducir.
- Añadimos los medallones unos minutos a la salsa para que coja bien todos los sabores.

Lo podéis acompañar con lo que más os guste, yo lo he hecho con un poco de cuscús, que con la salsa queda muy rico. Espero que os guste!


Mexican sirloin


Firstly of all, I have to say that this is not the real Mexican sirloin, this is sweeter version. In any case, it is delicious, the sauce tastes very good and the contrast with the fruits is just great.

Ingredients:

* Pork sirloin
* Pineapple
* Peach in fruit juice
* 1 knob of butter
* Beef stock
* 1 glass of Pedro Ximenez
* Worcestershire sauce
* Tabasco
* Salt
* Pepper
* Oil

Preparation:

- Cut the pork into medallions and dress with pepper. Then, place it in a pan with a knob of butter and a drop of oil. Let it browned until you like.
- Add the glass of Pedro Ximenez and flambé. Remove the medallions from the heat and reserve them for later.
- In the same pan, put the slices of pineapple and the peaches. Stir them and add the beef stock, a glass of water and some juice from the peach or the pineapple. Add the Worcestershire sauce and Tabasco. Leave it to reduce.
- Place the medallions into the sauce for a few minutes.

This dish can go with that you most like, I’ve accompanied with couscous, which was very tasty
with this sauce.

sábado, 16 de julio de 2011

Bombas de pimiento rojo


Como habréis observado por la foto, son los pimientos rellenos de toda la vida, pero como en cada casa...para gusto el relleno. Aquí os dejo el mío:

Ingredientes:

* 4 pimientos rojos
* 1 berenjena
* 400gr de pechuga de pollo
* Cebolla
* 2 dientes de ajo
* Orégano
* Pimienta
* Queso parmesano
* Tomate frito
* Guindilla (opcional)

Preparación:

- Cortamos los pimientos alrededor del rabito para quitarlo, lavamos y reservamos.
- En una sartén con dos cucharadas de aceite, ponemos la cebolla hasta que esté transparente, seguidamente añadimos el ajo bien picado.
Dejamos un par de minutos, retiramos y reservamos.
- Pondremos en la sartén el pollo que previamente habremos cortado en trocitos no muy grandes, ya que luego tendremos que rellenar el pimiento. Salpimentar al gusto. Cuando esté blandito, aunque no dorado, retiramos y reservamos.
- Ahora será el turno de dorar la berenjena también previamente troceada. Una vez lista, podremos añadir el resto de ingredientes que ya habremos sofrito: el pollo, el ajo y cebolla. ( Recomiendo pasar por la sartén los ingredientes por separado utilizando el mismo aceite para que cojan más sabor y para que no se os pase ninguno, ya que tardan más unos que otros).
- Añadimos dos cucharadas de tomate frito y orégano. Removemos bien y para aquellos atrevidos, trocear una guindilla y añadir al conjunto.Dejamos espesar la masa unos minutos.
- Precalentar el horno a 180º C. Con ayuda de una cuchara, iremos rellenando los pimientos con la mezcla de la sartén. Dejamos hornear unos 15 minutos o hasta que el pimiento se ablande un poquito.
- Una vez listos para servir, recomiendo espolvorear al gusto con queso parmesano rallado, queda fenomenal con el pimiento.

Es un plato que llena bastante, por eso podéis acompañarlo o bien con ensalada o con unas torradas pequeñas con queso para untar.


Red Pepper Bombs


As you have seen in the picture, they are the usual stuffed red peppers, but like in every
home..About preferences, different fillings.

Ingredients:

* 4 red peppers
* 1 eggplant
* 400g chicken breast
* Onion
* 2 cloves garlic
* Oregano
* Pepper
* Parmesan cheese
* Fried Tomato sauce
* Chilli (optional)

Preparation:

- Cut the peppers around its tail in order to remove. Wash them and reserve for later.
- In a pan, add two tablespoons of olive oil, put the onion until soft, and then add the
chopped garlic. Leave it a couple of minutes and reserve for later.
- Cut the chicken into little pieces and fry in a pan, add salt and pepper. When is tender,
not gold, remove from the heat and reserve it for later.
- Now is the turn to brown the eggplant, previously cut into pieces. Once ready, add all
the ingredients: the chicken, the garlic and the onion (I recommend frying the ingredients
separately using the same oil because they catch more flavor and some of them take more
time than others to be cooked).
- Add two tablespoons of tomato sauce and sprinkle oregano. Stir well and for those who are braves add chopped chilli. Leave it until thick.
- Preheat the oven at 180º C. Using a spoon, fill the peppers with the mixture from the pan. Bake for 15 minutes or until the peppers are tenders.
- Serve them with parmesan cheese on the top.

It’s a rich plate, so it can go with either salads or small toasts with spread cheese.

Aperitivo de galets


Buscando entre los armarios algo de inspiración para cocinar, me topé con esos maravillosos galets que me envió mi madre por Navidad (los ingleses no los comen) y el paquete aún estaba por la mitad. Así que indagando un poco, encontré este aperitivo de lo más sencillo y gustoso.

Ingredientes:

* Galets
* Pimiento rojo asado
* Palitos de cangrejo
* 1 huevo
* Mayonesa

Preparación:

Hervimos los galets con un poquito de sal hasta que estén al dente. Si hervimos demasiado se romperán. Escurrimos y reservamos hasta que enfríen.
Ponemos el huevo en agua al fuego para hacerlo duro.
Por otro lado, en un bol, rallamos los palitos de cangrejo, cortamos el pimiento en trocitos muy finos y rallamos el huevo, removemos todo con mayonesa.
Con ayuda de una cuchara pequeña, cogemos porciones de masa y rellenamos uno a uno los galets.


Ya están listos para servir, a disfrutarlos!!


Snacks of pasta shells


The other day, looking for something of inspiration between the kitchen drawers, I found these wonderful pasta shells that my mother sent me for Christmas (here is not typical) and the package was still half full. So I began to wonder and I finally created this tasty and refreshing snack.

Ingredients:

- Pasta shells
- Roasted red pepper
- Crab sticks
- 1 egg
- Mayonnaise

Preparation:

- Boil the pasta shells in salted water until they are “al dente”. Drain and leave them to
cool.
- Put the egg to boil. (Hard-boiled egg)
- In a bowl, grate the crab sticks, cut the pepper into very fine pieces and grate the egg,
stir everything with mayonnaise.
- Using a teaspoon, take pieces of the dough and fill the pasta shells one by one.

They are ready to be served! Let’s eat!

Copa de peras con frambuesas


Uno de mis últimos descubrimientos en el universo de la blogosfera ha sido el de "aliter dulcia". Los postres no son mi fuerte, así que cuando he visto este que parecía tan sencillo, no me he podido resistir.

Ingredientes:

* 2 peras
* 125gr. de frambuesas
* 1 yogur griego sin azúcar
* 200ml de zumo de manzana
* Zumo de medio limón
* 3 cucharadas de azúcar

Preparación:

- Pelar las peras, se dejan enteras. Se ponen a cocer a fuego lento, unos 20 min., junto con el zumo de manzana, el de limón, el azúcar y la mitad de las frambuesas. Cuando las peras estén blandas, se apaga el fuego y se dejan templar un poco.
- Cortar las peras por la mitad y quitarles el corazón con cuidado.
- Poner las mitades de pera en las copas, regar con el jarabe de la cocción. Añadir unas cucharadas de yogur griego, más jarabe por encima y decorar con el resto de las frambuesas.

Las peras han quedado de lujo, me apunto esta manera de cocerlas para futuras creaciones. Probad de hacerlas, quedan buenísimas!


One of my recent discoveries in the universe of the blogosphere has been "Aliter dulci." Desserts are not my speciality, so when I saw this, it seemed to me easy to prepare.

Ingredients:

* 2 pears
* 125gr. raspberry
* 1 sugar-free Greek yogurt
* 200ml apple juice
* Juice of half lemon
* 3 tablespoons sugar

Preparation:

- Peel the pears, leave them in one piece. Put to simmer for 20 minutes, add the apple juice, the lemon juice and the half of the raspberries. When the pears are soft, turn off the heat and leave to cool a little bit.
- Cut the pears in the middle and remove carefully the seeds.
- Put the pear halves in the cup, sprinkle with the cooking juice.
- Add a few tablespoons of the Greek yogurt add more cooking juice and topped with the remaining raspberries.

Pears were delicious; I’ll keep this way of cooking them for future creations. Try to make them!

Cup of pears with raspberries

Rollitos orientales de papel de arroz


Mi hermana me contaba el otro día sus incursiones en la cocina oriental y sus visitas al "chinatown" londinense. Como me puso los dientes largos y no podía ser menos, visité unos de los supermercados asiáticos que abundan en el centro de Barcelona. Si bien los ingredientes, se pueden encontrar en el supermercado de un conocido centro comercial cuyo nombre tiene un corte muy británico....(todo por no hacer publicidad, jeje). Así que me hice con unas cuantas cosas y he preparado dos tipos de rollitos. Uno a base de salpicón de pulpo, sacado de "miblogdepintxos" y otro de gambas de creación propia.

 Rollitos de salpicón de pulpo:

Ingredientes:

* Obleas de papel de arroz
* Pulpo cocido
* Cebolla
* Pimiento verde
* Tomate
* Mango
* Aceite
* Vinagre
* Sal
* Salsa de soja y/o salsa agridulce para acompañar

Preparación:

- Picar bien menudo el pulpo, la cebolla, el pimiento, el tomate y el mango.
- Aliñar con aceite, vinagre y sal y mezclarlo bien.
- Dejarlo reposar en un escurridor unos 30 minutos para eliminar los jugos.
- Poner agua en un plato hondo y sumergir una a una las obleas de arroz durante unos 30 segundos para que se hidraten y podamos trabajar con ellas. Ponerlas sobre papel de cocina para que absorba el exceso de agua.
- Extender las obleas y poner en el centro un poco de relleno, doblar y hacer los rollitos.
- Se puede acompañar de las salsas que queráis, yo lo he servido con salsa de soja y con salsa agridulce.


Rollitos de gambas:

Ingredientes:

* Obleas de papel de arroz
* Gambas peladas
* Cebolla
* Pepino
* Rúcula
* "Lemon grass" o hierba limón
* Semillas de sésamo
* Jengibre rallado
* Salsa de soja y salsa agridulce para acompañar

Preparación:

- Cortar la cebolla en juliana y el pepino pelado en tiritas finas.
- Pochar la cebolla junto con las gambas, añadirles unas semillas de sésamo, un poco de jengibre rallado y un chorrito de salsa de soja.
- Hidratar las obleas de arroz como se ha explicado anteriormente.
- Extender las obleas. Colocar en el centro unas hojas de rúcula, las gambas con la cebolla, el pepino y unos trocitos de hierba limón. Enrollar.
- Se puede servir con salsa de soja, agridulce, etc...

Estos rollitos admiten todos los rellenos que imaginéis. Se pueden comer tal cual o si lo preferís, después de enrollarlos, los podéis freir unos minutos en aceite caliente. Yo los he dejado tal cual para que fuesen más ligeros. Espero que os guste!


Eastern rolls of rice paper


My sister told me the other day her adventure visiting Chinatown in London to make norimakis. As I couldn’t be less, I visited some of the Asians supermarkets that are situated in the center of Barcelona. So I took a few things and now I’ve prepared two types of rolls. One of them inspirited from the website “miblogdepintxos” and the other one was created by my imagination.

1. Octopus rolls
Ingredients:

* Rice paper
* Cooked octopus
* Onion
* Green pepper
* Tomato
* Mango
* Oil
* Vinegar
* Salt
* Soy sauce and / or bittersweet sauce

Preparation:

- Chop the octopus, the onion, the pepper, the tomato and the mango.
- Dress with oil, vinegar and salt and mix well.
- Leave to rest in a drying rack for about 30 minutes to remove the juices.
- Put water in a bowl and dip one by one the rice paper for 30 seconds. Place them on paper towels to dry the excess of water.
- Extend the rice paper and put in the center some stuffing, roll them up.
- Serve them with soy sauce or bittersweet sauce.

2. Shrimp rolls
Ingredients:

* Rice papers
* Peeled Shrimps
* Onion
* Cucumber
* Rocket
* "Lemon grass”
* Sesame seeds
* Ginger grated
* Soy sauce and/or bittersweet sauce

Preparation:

- Cut the onions and the cucumber into thin strips.
- Poach the onions and the shrimps, add the sesame seeds, a little bit of grated ginger and splash of soy sauce.
- Put the rice paper onto water, as I explained before.
- Extend the rice papers, put in the center of rocket leaves, the shrimps with onion, the cucumber and a few pieces of lemon grass. Roll them up.
- Serve with the sauces.

These rolls can be stuffed with all can you imagine. You can eat them raw or after roll up, you can fry them a little. I hope you enjoy them!


martes, 12 de julio de 2011

Bacalao con tomate y "all i oli"


Será por la sangre portuguesa que corre por mis venas, será porque adoro Portugal, su lengua, su cultura...Lo cierto es que el bacalao me encanta. Dicen que los portugueses tienen una receta de bacalao diferente para los 365 días del año. Ahí va una de ellas.

Ingredientes:

* 4 lomos de bacalao
* 5 tomates
* 1 cebolla mediana
* 4 dientes de ajo
* 4 pimientos del piquillo
* 2 huevos
* Harina
* Aceite de oliva
* Sal

Preparación:

- Picar la cebolla y 2 dientes de ajo y pocharlos con un poco de aceite. Añadir los tomates también picados y cuando estén medio hechos añadir los pimientos del piquillo cortados a trozos. Rectificar de sal y triturar el sofrito. Reservar.

- Hacemos un "all i oli" con los 2 dientes de ajos restantes, los huevos, una pizca de sal y aceite. Reservamos.

- Enharinar los lomos de bacalao y freir ligeramente en aceite caliente. Ponerlos en papel de cocina para que escurra el exceso de aceite.

- En una fuente de horno, ponemos una capa del sofrito, encima los lomos de bacalao y sobre estos una cucharada generosa del "all i oli". Gratinamos en el horno hasta que el "all i oli" se dore.

La presencia del piquillo en el sofrito le da un toque muy bueno. Aconsejo disponer de pan para mojar en la salsa y acompañar de un vino tinto joven. Espero que os guste!


Codfish with tomato sauce and all i oli (typical Spanish sauce)


It ‘ll be for may Portuguese blood that runs through my veins, it’ll be because I love Portugal, its language, its culture…The truth is that I love the cod. It is said that Portuguese have a different recipe for the 365 days of the year. There goes one of them.

Ingredients:

* 4 cod loins
* 5 tomatoes
* 1 medium onion
* 4 cloves garlic
* 4 red peppers
* 2 eggs
* Flour
* Olive oil
* Salt

Preparation:

- Chop the onion and 2 cloves of garlic. Place in a pan with a little bit of oil. Add chopped tomatoes and when they are half made, add the red peppers, previously cut into pieces. Add the salt and mash the sauce. Reserve for later.
- Coat with flour the cod loins and fry them in hot oil. Place in a plate covered with kitchen paper to dry the excess of oil.
- In a baking dish, put a layer of the sauce, the cod loins and over them a tablespoon of all I oli. Cook until golden.

The red piquillo sauce gives a very good taste. As a good advice, I recommend having bread to
dipping in the sauce and accompany by a young red wine. I hope you like it!